With ThinkHub Groups, users can create groups and add individual content assets to those groups. Groups can contain notes, sketches, images, videos, PDFs, or any other content asset shared to the Canvas. Once a group is created, users have the ability to assign a theme (background and text color), and can control the way the group content is displayed (spacing between assets, alignment, and more…). ThinkHub Groups are an effective way to manage and organize Canvas content, and help participants to visualize and categorize content in large team planning and brainstorming sessions.
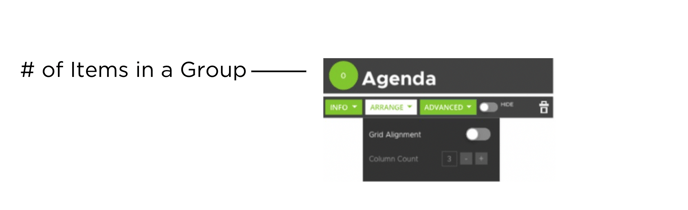
1. Number of Items in a Group
The number next to the Group name indicates how many items are within that group.
2. Group Name
The Group header gives you the ability to edit the Group name. Simply tap anywhere within the Group header text to put the Group header in edit mode.

3. Info
Tap this button to display the Group info card. The info card allows you to put a more detailed description of the Group and/or the Group contents
4. Arrange
Tap this button to display different Group arrangement and layout options including adjusting the number of items in a row.
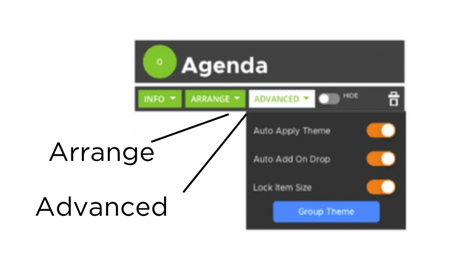
Tap this button to display different Group behavior. For example, you can select and apply a different application background and text color for all the Group contents.
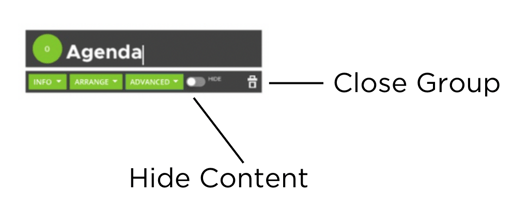
Tap this button to hide or minimize the Group contents on the canvas.
7. Close Group
Tap this button to close or delete the Group. Note: The Group contents will remain on the canvas and retain the group attributes (if applicable), but will no longer be grouped together.
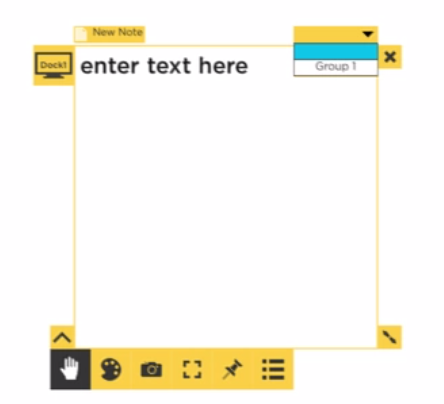
8. Adding Items to a Group
There are two ways to add Content to a Group.
Method 1: To add an item to a group, drag the item close to the group. A light blue border and “Add to..” text will appear around the group. Release the item and it will automatically be added to the group.

Method 2: Select the content you would like to move into your group. When your content is in the active state, you will see a drop down menu in the upper right corner. Select the group you want to move the content to. This will send your content to that group. This method is best when adding content to a group in another area on your Canvas (so you don't have to drag your content far).
Removing Items from a Group

To remove an item from a group, drag an item away from the group until an orange border and “Remove from” text appears around the group.
You can also use the drop down menu in the upper left of your content tray when your content is in the active state (method 2 for adding content to a group). To remove content from all groups using this method, select the empty drop down box.
For more ways to organize and arrange content, check out this article on organizing content on ThinkHub.